When it comes to electrical safety in your home or workplace, GFCI outlets play a vital role. GFCI stands for Ground Fault Circuit Interrupter, and these outlets are designed to protect you from electrical shocks by quickly shutting off power in the event of a ground fault. However, just like any other electrical component, GFCI outlets can sometimes malfunction. That’s why it’s crucial to know how to test GFCI outlets with a multimeter. In this article, we will provide you with a step-by-step guide on testing GFCI outlets using a multimeter to ensure they are operating correctly.
How to Test GFCI Outlet with Multimeter
Gather the Necessary Tools
Before you begin testing your GFCI outlet, make sure you have the following tools handy:
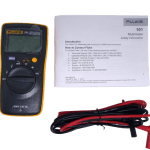
- Multimeter – A digital multimeter is essential for accurately measuring electrical voltage.

- Voltage tester – This device helps detect the presence of voltage in an outlet.

- Safety gloves – Protect your hands with insulated safety gloves to minimize the risk of electrical shock.

Prepare for Testing
To ensure your safety during the testing process, follow these precautions:
- Turn off all appliances or devices connected to the GFCI outlet you plan to test.
- Use a voltage tester to confirm that there is no voltage present at the outlet.
- Put on your safety gloves to protect yourself from potential electrical hazards.
Set Up the Multimeter
Now, let’s set up the multimeter to test the GFCI outlet:
- Turn on the multimeter and set it to AC voltage mode.
- Adjust the voltage range on the multimeter to a suitable setting, usually 200 or 300 volts.
- Ensure the black test lead is inserted into the COM (common) port on the multimeter.
- Insert the red test lead into the VΩmA (voltage) port on the multimeter.
Test the Line Terminals
The line terminals on a GFCI outlet are where the power supply connects. To test the line terminals, follow these steps:
- Insert the black test lead into one of the narrow vertical slots of the GFCI outlet.
- Insert the red test lead into another vertical slot of the GFCI outlet.
- Check the multimeter reading. It should display the voltage reading of the power supply. In our case the supply voltage is 220V.
If you get a voltage reading, it indicates that the power supply is reaching the GFCI outlet correctly. If there is no voltage reading, it may indicate a problem with the line terminals or the power supply.

Test the Load Terminals
The load terminals on a GFCI outlet are used to provide power to additional outlets or downstream devices. To test the load terminals, follow these steps:
- Remove any devices or outlets connected to the load terminals.
- Insert the black test lead into one of the narrow slots of the GFCI outlet.
- Insert the red test lead into another wider slot of the GFCI outlet.
- Check the multimeter reading. It should display the voltage reading of the load terminals.
A voltage reading on the load terminals confirms that power is being properly supplied to downstream devices. If there is no voltage reading, there may be an issue with the load terminals or the downstream wiring. In our case, the power is being properly supplied as a result it shows the supply voltage.

Reset the GFCI Outlet
After testing, it’s essential to reset the GFCI outlet to ensure it is functioning correctly. Follow these steps to reset the outlet:
- Press the “Reset” button on the GFCI outlet.
- Once the outlet has been reset, press the “Test” button to simulate a ground fault.
- The GFCI outlet should trip and cut off the power, indicating that it is working correctly.
If the GFCI outlet does not trip or reset, it indicates a potential malfunction, and it is advisable to replace the outlet.

Conclusion
Regularly testing GFCI outlets with a multimeter is crucial for maintaining electrical safety in your home or workplace. By following the step-by-step instructions outlined in this article, you can ensure that your GFCI outlets are operating correctly and providing the necessary protection against electrical hazards. Remember to exercise caution and prioritize safety throughout the testing process. If you encounter any issues or are unsure about performing electrical work, it’s always best to seek professional assistance from a licensed electrician.
FAQs
Q: Can I test a GFCI outlet without a multimeter?
A: While a multimeter provides accurate voltage readings, you can perform a simple visual test to check if a GFCI outlet is functioning. Press the “Test” button on the outlet, and if it trips, it indicates that the GFCI outlet is operational.
Q: What if my GFCI outlet trips repeatedly?
A: If your GFCI outlet trips repeatedly, it may indicate a ground fault. Disconnect all devices from the outlet and press the “Reset” button. If it still trips, there may be a problem with the outlet or the wiring. It’s advisable to consult a licensed electrician for further inspection and repairs.
Q: Can I test a GFCI outlet with a non-contact voltage tester?
A: Non-contact voltage testers are useful for detecting the presence of voltage but cannot provide accurate voltage readings. While they can help identify if power is reaching the outlet, a multimeter is the recommended tool for precise testing.
Q: How often should I test my GFCI outlets?
A: It’s recommended to test your GFCI outlets once a month to ensure they are functioning correctly. Additionally, test them after power outages or any electrical work in your home or workplace.
Q: Can I replace a GFCI outlet myself?
A: If you have experience and knowledge of electrical work, you can replace a GFCI outlet yourself. However, if you’re unsure or uncomfortable working with electricity, it’s best to hire a licensed electrician to ensure the installation is done safely and correctly.


